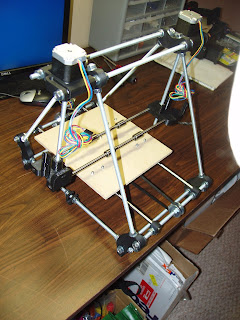
A small issue - I had to drill out the X ends with a 5/16" drill bit. Don't forget to put the linear bearings on the smooth rods before putting the X ends on!
The main issue I experienced during this step was attaching the Z axis motor to the lead screw using the couplings. This occurred at 5:40 in the video. The couplings that were included in my kit were not the same as in the video and they didn't actually work. The couplings described in the video were made of aluminum and had 4 grub screws that tightened against the motor shaft and lead screw. My coupling were made of aluminum and had just two screws that simply tightened the coupling around the motor shaft and lead screw kind of like a belt around a waist. More importantly, once the screws were fully tightened, the coupling was still loose on the lead screw so it wasn't functioning properly.
I called the NWRepRap help line and Aaron Dale answered. He explained that if I wanted to use the aluminum coupling from the kit, I would have to insert a spacer such as a couple layers of electrical tape or shrink wrap to close the gap. Alternatively I had the option of using printed plastic couplings that were also in my kit. The plastic couplings come in the form of two shells that clamp around the motor shaft and lead screw using 4 14mm M3 screws. I didn't like either option very much, so Aaron kindly offered to mail me a set of aluminum couplings just like in the video. They arrived a few days later via first class USPS and worked very well.
Aaron explained that the consensus in the RepRap community is that the plastic couplings are better because the aluminum couplings stretch out over time. While that may be true, I examined the plastic couplings and I suspect that the amount of tension required to get a tight grip would probably put great stress on these pieces. If they aren't tight enough, then the Z axis lead screw will slip with respect to the Z motor.
Here is how the plastic couplings look and fit:
Here is how the aluminum couplings that are shown in the video look and fit:
Here is how my Prusa looks after Video 9 with the Z motors and X axis is installed:


No comments:
Post a Comment