Friday, January 31, 2014

Install The Arduino Driver on Your PC (Video 21)

Recap: After building a Prusa Mendel 3-D printer from kit I purchased from nwreprap.com,  I'm in the process of setting up the software and calibration.  This blog entry will guide you through installing the Arduino driver on your PC. This blog entry assumes that you have downloaded all of the necessary software described in this blog entry.

The directions below are for a PC running Windows XP.  (Note: On Nov 15, 2015 I attempted to follow these instructions on a Windows 7 PC and it worked except for this important difference: with Windows 7 you must be logged into the Administrator account to install the Arduino drivers.  If you don't see the "Update Driver" menu choice, you're likely not logged into the Administrator account.)

With the USB cable plugged into both the Arduino and your PC you should see a red light on the Arduino which indicates it's getting power from the PC via USB:

Click on Start..Control Panel
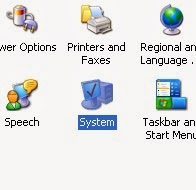


Click on System


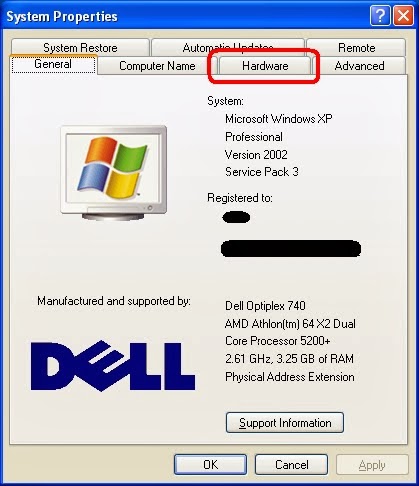
Click on the Hardware Tab


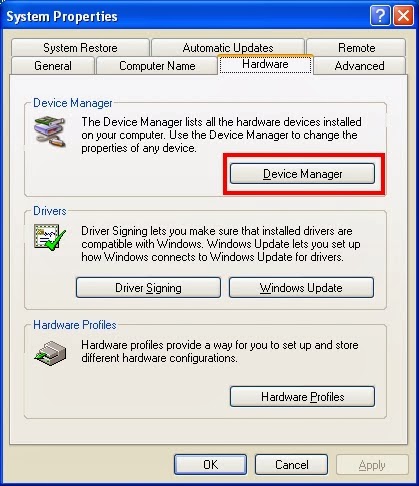
Click On Device Manager


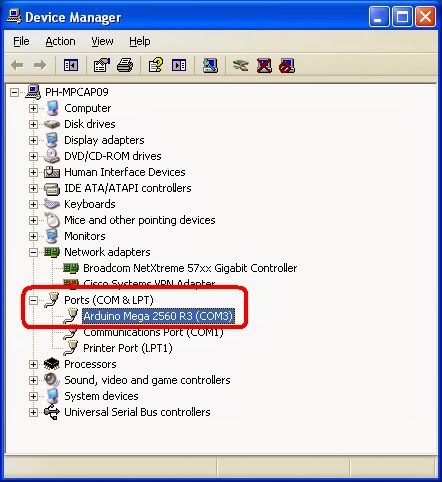
and you'll likely see device like the one in the red frame.  If you don't see it, try unplugging the Arduino and plugging it back in.


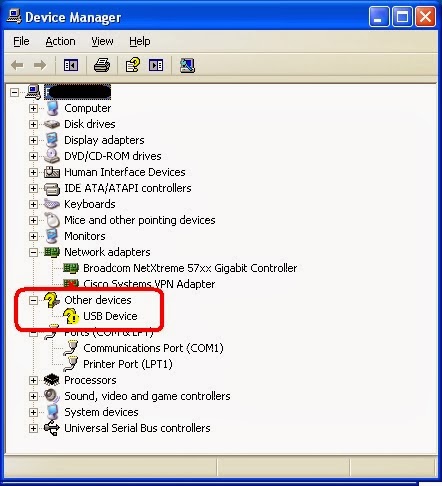
and possibly the "Found New Hardware Wizard" window will pop up.  I suggest cancelling the "new Hardware Wizard" and installing the driver manually.  Right-click on the "USB Device" and click "Update Driver".


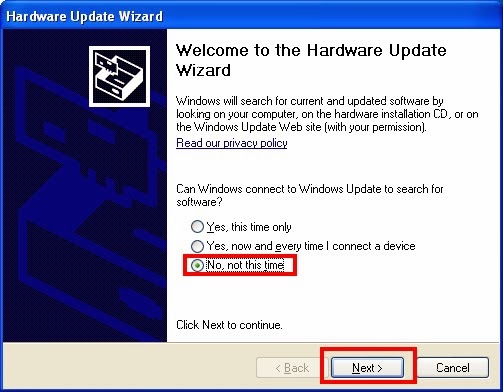
You'll see the "Hardware Update Wizard".  Click on the "No, not this time" radio button and click on "Next".


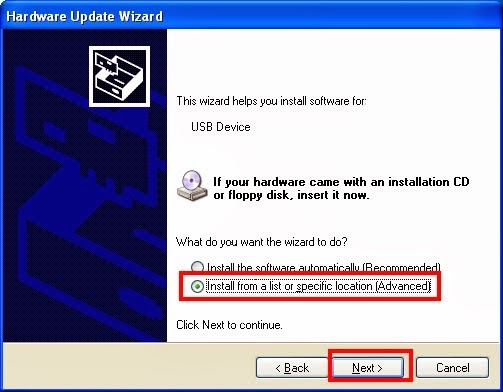
click on "Install from a list or specific location (Advanced) and click "Next"


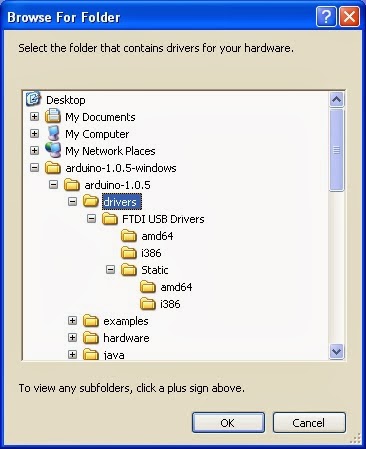
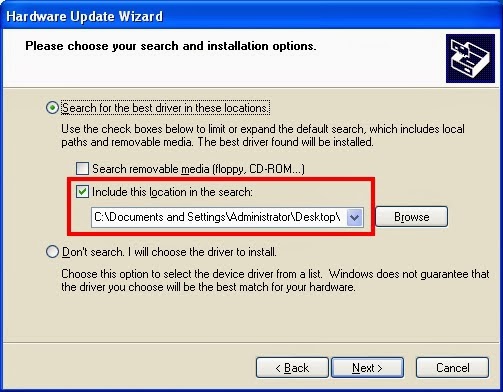
click on "Search for the best driver in these locations.  Uncheck "Search removable media".  Check "Include this location in the search".  Click "Browse" and choose the "drivers" directory within your Arduino software.  Click "Next".


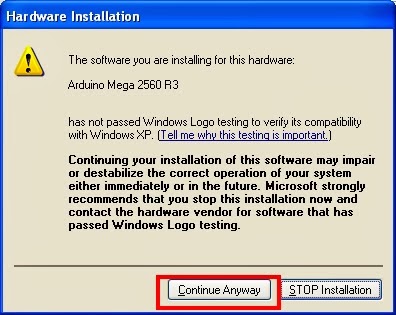
You'll see a warning that the Arduino Mega 2560 R3 hasn't passed Windows Logo testing but you have to accept the risk if you want to use the Prusa Mendel.


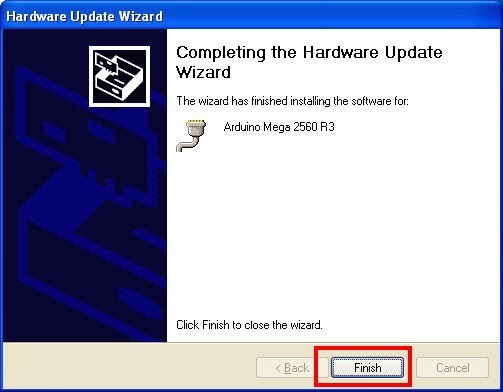
Now, if everything went ok, the Hardware Update Wizard should be finished.  Click on "Finish". \


You should see the Arduino as a device in your device manager.  Your port (COM1, COM2, etc.) might be different.


Download the Software For Printing On a Prusa Mendel (Video 21)

Recap: After building a Prusa Mendel 3-D printer from kit I purchased from nwreprap.com,  I'm in the process of downloading the necessary software.

I followed the instructions in Video 21 to set up the software.  I'm using an older PC running Windows XP.

Download the compressed archives and extract them.
Extract all software to your desktop.

The Road Ahead to The first Print

Recap: I've finished building a Prusa Mendel 3D printer from a kit and I've powered it on.  Now I have these steps remaining before I can print an object:

Some items above do not yet have a hyperlink.  I'll try to complete the relevant blog entries in the next couple of weeks.

Monday, January 20, 2014

Flipping the switch - the Frankenstein moment

Recap: I've been building a Prusa Mendel 3D printer from a kit I purchased on NWRepRap.com.  The kit is fully assembled and I'm going to flip the switch for the first time.

Well, actually this thing doesn't have a switch because the power supply simply plugs into the wall socket and the output of the power supply plugs into the controller board.

I have not connected the controller board to my PC, just the power supply.  This is basically a smoke test.

I'm expecting to see nothing move and I'm hoping that nothing smokes.  Here is the Frankenstein Moment:


So basically my Frankenstein has a twitch in the extruder motor.  I tried several things to resolve this, including swapping the Pololu drivers, adjusting the current.  But ultimately the cause was the fact that the Arduino controller was not initialized and the fix was to simply upload the firmware which I will cover in another post very soon.