Monday, March 24, 2014

Start the print using Pronterface

This post is the culmination of my 6-month effort to build a Prusa mendel 3D printer from a kit I purchased from nwreprap.com.

I've gone through the build videos.

I've performed these set-up and calibration steps.

I'm actually going to be printing a small cylinder instead of a 20 mm cube as I had intended.  The cylinder is smaller than the 20 mm cube and will print faster.

Launch pronterface


Check port, connection data rate and click on "Connect"

Click on "Load File"

Choose your .gcode file

Now click "Print"


This video shows the start of the printing process.  You'll see how the heat bed and hot end heat up and the printing starts.  The object begins to form.


This video captures the completion of the print.
 
 
When it's done, click "Off".

The heat of the heat bed is what causes the object to adhere to the heat bed.  Once the heat bed has cooled down to room temperature, it should be easy to lift the printed object off the heat bed.  To accelerate the process, I blow compressed air from a can onto the printed object.


That's it!

Prepare a g-code file for printing using Slic3r

I covered downloading all necessary software in this post and presented an overview of the steps to be completed before the first print in this post.

An overview of the process of going from a 3-D design to a printed object is available in this post.

Preparing a .gcode file for printing on a Prusa Mendel 3-D printer is fairly easy with Slic3r. 

You'll need your digital calipers to measure the diameter of the filament that you're planning to use.

To start, you need an .stl file.  In my overview post, I indicated that an .stl file can be created with Sketchup and exported using su2stl plug-in, but for this example I'm going to keep things simple and work with an existing .stl file of a 20 mm cube called 20mm_cube.stl which was created by engineglue and uploaded to Thingiverse.  Directions for downloading it are here.

The .stl file contains the design of the object that you are going to print.  When you create a .gcode file with Slic3r, you convert the .stl design into a set of instructions for the Sprinter firmware on the Arduino controller to carry out.  There are instructions for moving each of the axes, turning on the extruder, turning on the hot end and the heat bed.

Here are the steps:

First, click on the Slic3r icon to launch it.

 The Slic3r user interface appears.
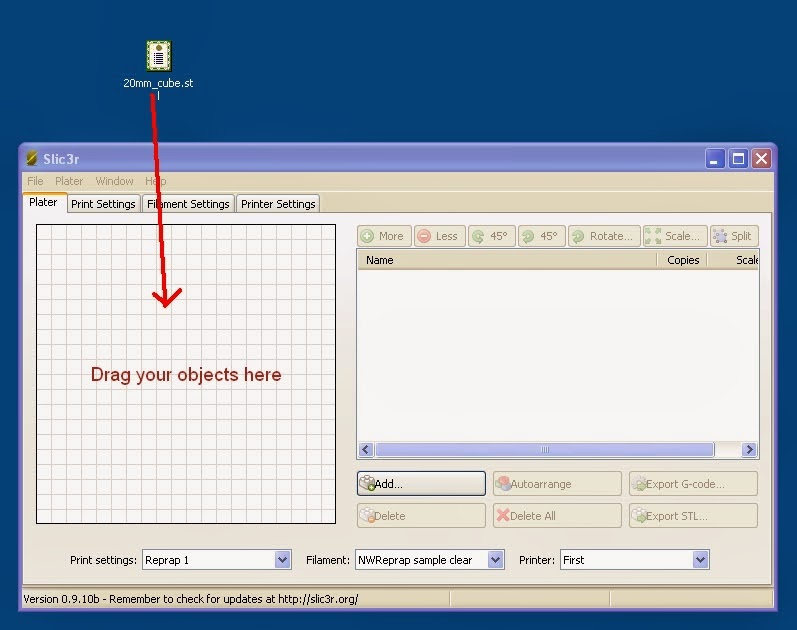
Drag the .stl file from the desktop into Slic3r workspace

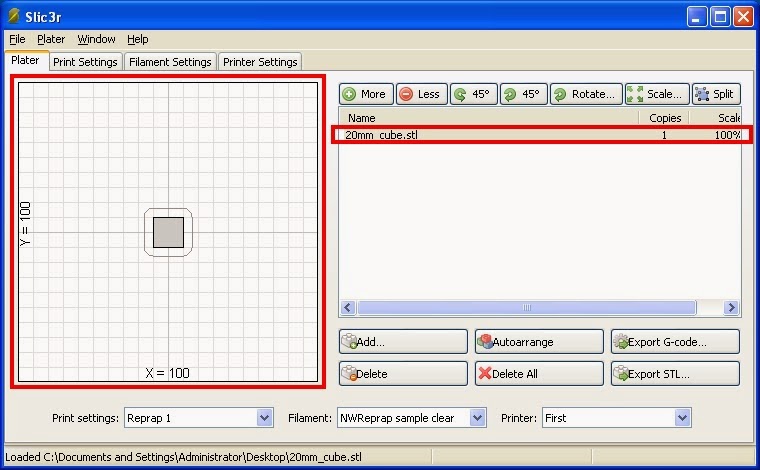
The 20 mm cube has been added to the layout

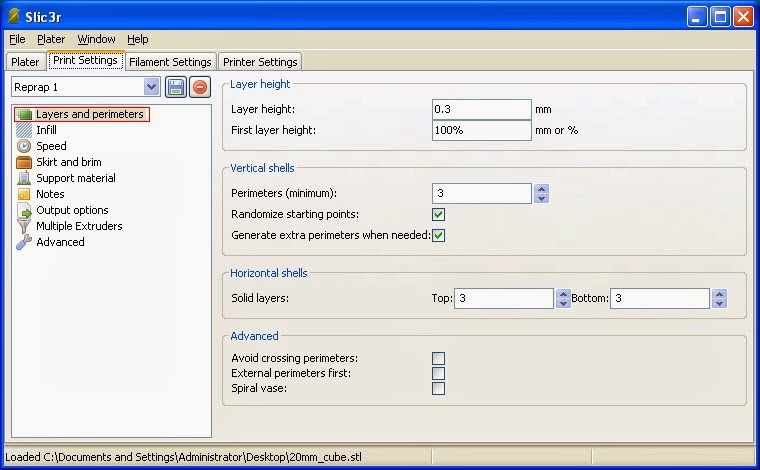
Check the Print Settings Layers and Perimeters.  Make sure that layer height is set to 0.3 mm

Check the Print Settings Infill

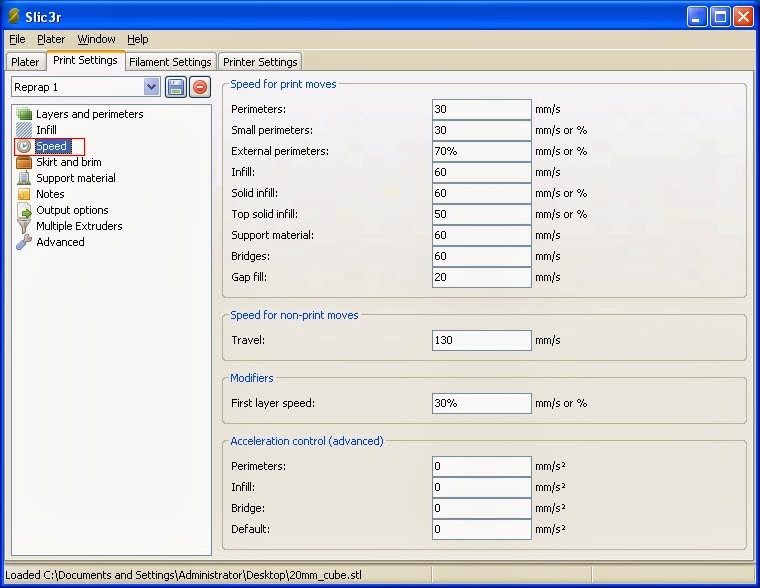
Check the Print Settings Speed

Check the Print Settings Skirt and Brim

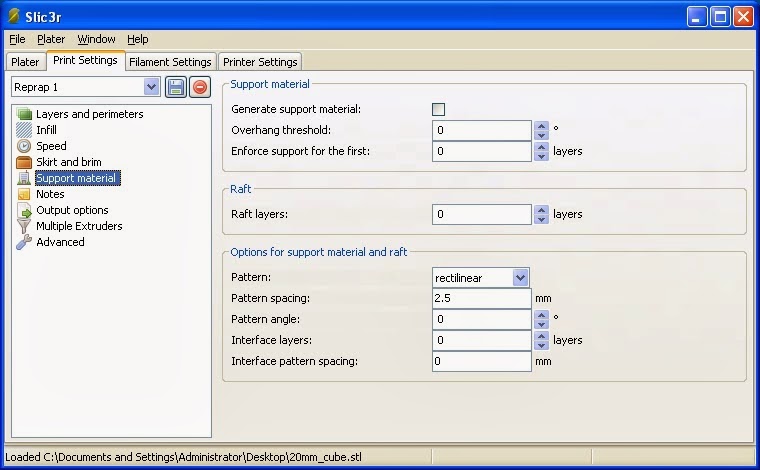
Check the Print Settings Support Material

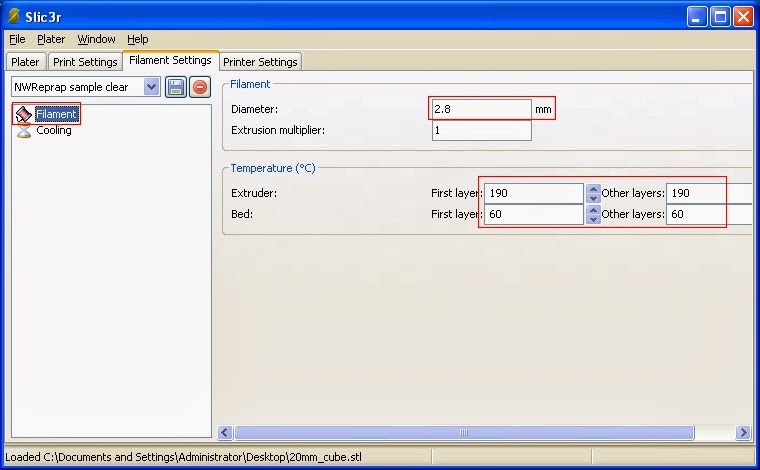
Check the Filament settings.  Measure the diameter of your filament with your digital calipers and enter it.
Also it's very important to enter the Extruder and the heat bed temperatures.  These values work well for PLA.

Check the Cooling settings.  If you installed the fan that comes with the nwreprap Prusa kit, enable it.

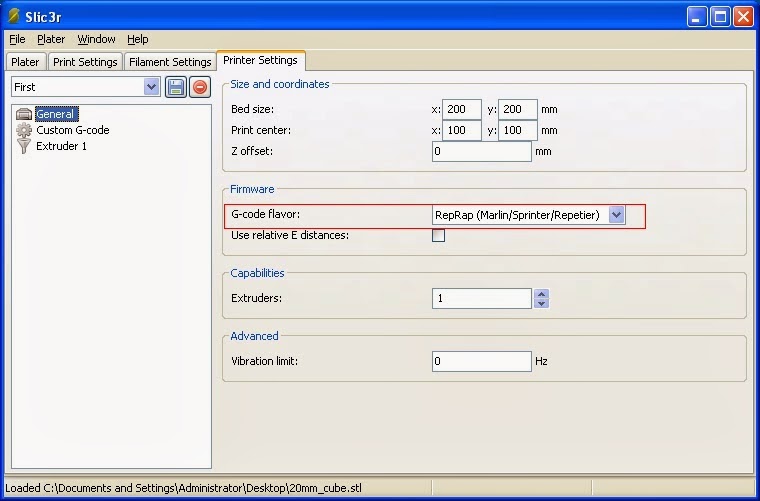
Check the printer settings.  If you've downloaded Sprinter firmware, make sure that the G-code is set accordingly. 

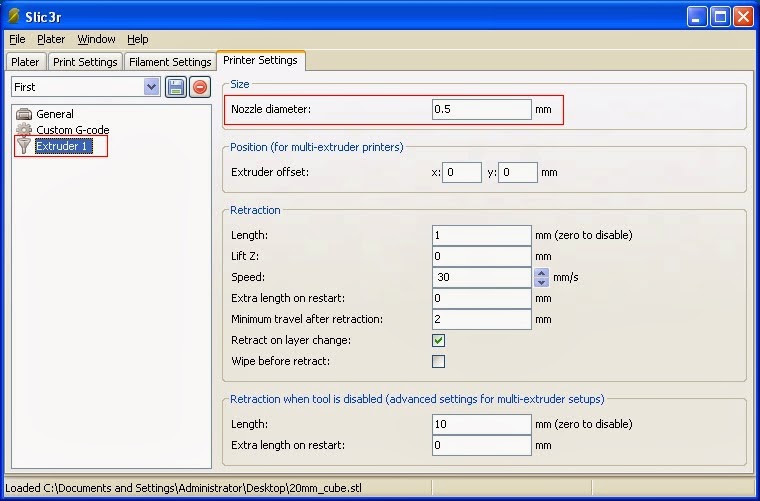
In Extruder settings, double-check the nozzle diameter.  My nwreprap.com Prusa kit has a .5 mm nozzle.

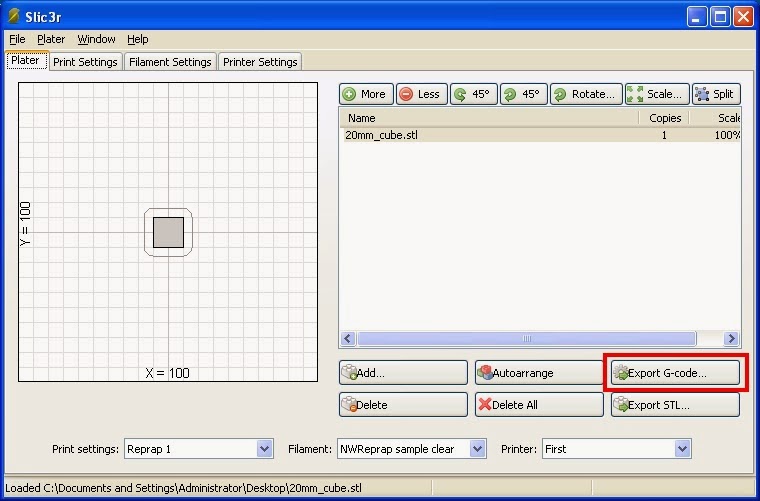
Go back to the Plater Tab and export the G-code file. 
Now you should have a .gcode file ready to be uploaded to your Prusa Mendel.

Overview: Going from 3-D design to printed object

Recap: I've assembled a Prusa Mendel 3-D printer from a kit I purchased on nwreprap.com.  I've calibrated (post1, post2, post3) it, downloaded all of the necessary software and installed the driver and uploaded the firmware.  I also checked all of the functions using Pronterface.

Now I am ready to design an object and print it, but before I get to that, I'd like to present an overview of the process of going from a 3-D design to the printed object.

I want to emphasize that the process I'm going to present is just one of the many that are out there.  This is a simple process that works for me and is easy to get started with.

Step 1: Design your object with Sketchup
Step 2: Export your design from Sketchup to an .stl file using the su2stl plug-in
Step 3: Use Slic3r to convert the .stl file into a set of instructions to be uploaded to your printer.  This set of instructions is stored in a .gcode file.
Step 4: Use Pronterface to upload the instructions contained within the .gcode file to your printer.

Here it is visually:


For information on downloading Slicer and Pronterface, see this post.

I haven't covered Sketchup or the su2stl plug-in yet, but I hope to in a future post.

Sunday, March 2, 2014

Priming The Hot End

Recap: I've built a Prusa Mendel 3-D printer from a kit I purchased from nwreprap.com.  I'm in the process of calibrating the printer in preparation for the first print.

When a print starts, the filament needs to be positioned inside the hot end in such a way that when the extruder is instructed to feed the filament, the molten filament exits the hot end right away.  If the molten filament does exit the hot end right when the extruder is activated, what tends to happen is that by time it actually exits, the hot end might be several layers above the surface of the heat bed.  When the distance between the hot end and the surface below it exceeds a certain amount, instead of adhering to the surface of the heat bed, the molten filament will curl into a messy blob.

So we need to advance the filament into position and actually feed some filament through the hot end.  For this we'll use Pronterface.  You'll also need a pair of pliers or tweezers to remove the excess filament at the end of this step. This step assumes you've downloaded all of the software, installed the Arduino driver, uploaded the firmware and have a good understanding of Pronterface.


  • Pull the idler with your thumb, you should see the hobbed bolt.  Insert the filament into the opening so that it passes the hobbed bolt.  

  • Start Pronterface

  • Check the port, set connection speed to 250000 bps and press "Connect" to connect to the Printer

  • Raise the hot end at least 25 mm above the heat bed

  • Turn on the hot end
  • Wait for the hot end to heat up to full temperature
  • Activate the extruder to feed the filament until you see the molten filament exit the hot end.
  • Turn off the hot end - click the "Off" button next to "Heat:"
  • remove the excess filament with pliers or tweezers.


Now your filament is positioned for printing.  If you saw the filament feed in but nothing came out, it's possible that the hot end did not get hot enough to melt the filament.  Unfortunately what can happen is the hobbed bolt will grind away at a small section of the filament and it will no longer feed the filament.  Try pulling the filament out by hand and starting over.